If you are like me and have little time this easy and affordable DIY snowman craft made from string and cotton pads is perfect. It only takes about 15 minutes — so it’s ideal when you still have a pile of dishes and laundry…
My mum, my toddler, and I all sat down together to make this winter craft together, and it turned out so cute that we hung it by the window!

🧵 What You’ll Need
All materials are inexpensive and easy to find or you can get the online version— I got everything from a German dollar store.

- Thick white cord – for the snowman’s body (like this macrame cord on Amazon)
- Cotton pads – for the back side
- Small black half pearls or buttons – for eyes and buttons
- Red felt or paper – for the nose
- Red yarn – for the scarf (we braided and twisted it)
- Cardboard – for the base (I just used an old box)
- Glue – super glue or craft glue
- A red string so you can hang it as an ornament
- A Popsicle stick – to attach head and body
💡 Tip: Always keep some cardboard and glue at home — they’re the base of so many quick toddler crafts! You can find more ideas here:
👉 Toddler Crafts Using Old Cardboard Boxes
RELATED: EASY WINTER CRAFTS FOR TODDLERS – YOU DON’T WANT TO MISS

🪚 How to Prep the Winter Activity
Since toddlers don’t wait patiently (especially when you’re also doing laundry or cooking!), I kept everything ready before starting:
- Cut two cardboard circles for the snowman’s head and body.
- Prepare short pieces of white string.
- Set out glue, buttons, and the red felt nose and a popsickle stick.
- Have cotton pads ready for the back.

☃️ Step-by-Step: How to Make the Snowman Craft
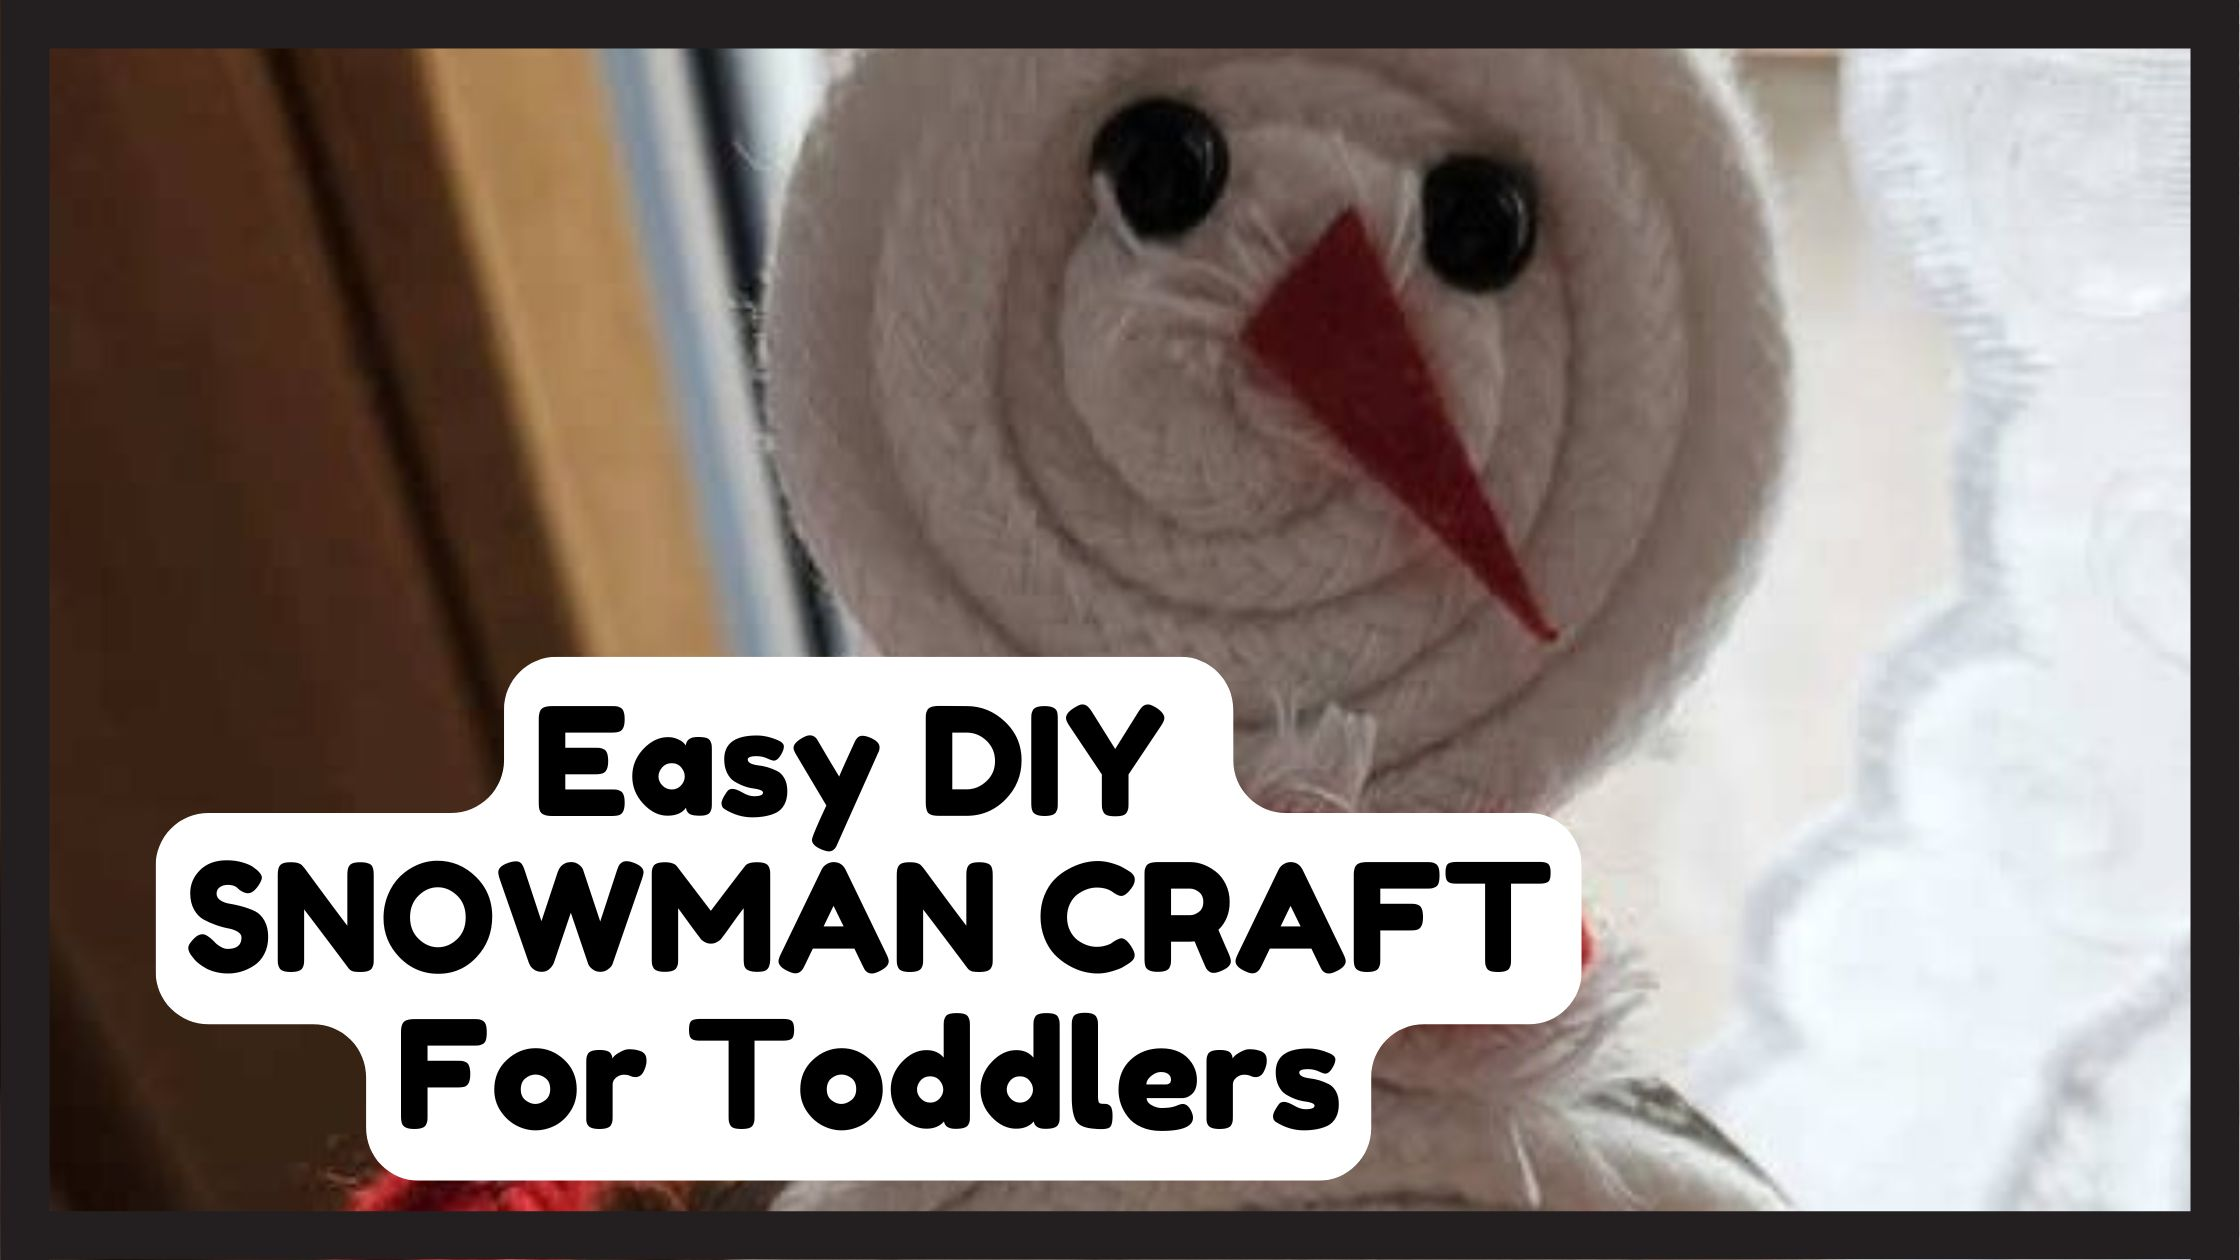
- Glue the white string in a spiral pattern on each cardboard circle.

- Glue on the eyes and buttons using small black half pearls.

- Add a red felt triangle for the nose.

- Add cotton pads to the back of each circle to make it look clean and to hide the popsicle stick (I used it to attach top and bottom). I glued a red string in between to hang the snowman as a christmas tree ornament.

- Add the red scarf (braid and twist the yarn or use a red cord instead).
- Let everything dry — done!
It’s that easy! My toddler helped with gluing and cutting strings, while I made the scarf later. The whole project took about 15 minutes, and the total cost was under €1.
🌟 What I’d Do Differently Next Time
If I had more time, I’d cover both sides with string (it would look even neater). But honestly, for a quick toddler craft that doesn’t require perfection — this was just right! And if you are in a hurry you can just use cotton pads on both sides.
I’d also not braid the red string anymore. It took forever and I think I braided 2 meter because the string was so thin. I would use a thick cord and be done with it faster.
💡 Why This Craft Works So Well with Toddlers
- ✅ Short attention span-friendly (done in 15 min)
- ✅ Develops fine motor skills (gluing, cutting)
- ✅ Encourages creativity and independence
- ✅ Great sensory play (soft cotton + textured string)
- ✅ Fun family bonding time
💬 FAQ – Snowman Craft for Toddlers
Q: What age is this snowman craft suitable for?
A: It’s best for toddlers aged 1.5 to 3 years with adult supervision.
Q: Can I use paper instead of cardboard?
A: Yes, but cardboard gives the snowman more structure — especially if you hang it up.
Q: What kind of glue works best?
A: I used strong craft glue, but white school glue or hot glue (for adults) also works.
Q: How can I adapt this for older kids?
A: Older kids can make accessories — hats, arms, or decorate both sides.
Q: Can I turn this into a Christmas ornament?
A: Definitely! Just add a ribbon or thread at the top for hanging.
❄️ What to Read Next
Looking for more cozy winter craft ideas to try with your little one? Here are a few fun and easy projects that go perfectly with our DIY Snowman Craft:
- 🐻 Polar Bear Outlines & Printables – Free printable templates for coloring, crafting, or sensory play.
- 🐧 Free Penguin Templates for Kids Crafts – Simple penguin outlines perfect for painting or cutting practice.
- ✨ Salt Snowflake Craft for Toddlers – A magical way to paint shimmering snowflakes with salt and watercolor.
- 🐾 Polar Bear Craft for Toddlers – Soft, fluffy polar bears your toddler will love to touch and make.
- 🎄 Easy Pinecone Christmas Tree Ornaments – Turn nature finds into adorable Christmas decorations.
Enjoyed This Post? Here’s How You Can Help!
")
If you enjoyed this post, please take 60 seconds to tell a friend.
Whether it’s a quick mention in a mom’s group, sharing on social media, or chatting about it with friends, every share makes a big difference.
I spend many hours crafting posts like this.
Every little helps and I rely on people like yourself to help grow traffic!📌 Pin now, read later!
Latest Posts:

Easy Natural Dyed Easter Eggs with Toddlers — A German Tradition
Ever want an Easter activity that’s calm, meaningful, and actually teaches something real… not just…

This Finger Painting Easter Craft… Made My Toddler Go Wild
Sometimes toddlers wake up and choose chaos 😅 mine was in full cheeky mode that…

29 Month Old Toddler Activities That Actually Work at Home
Some days we craft… and some days we absolutely don’t 😅After lunch and in the…

🐰 Easy Recycled Magazine Bunny Craft (5 Min Easter Fun for Curious Toddlers)
Some days honestly… I just need something quick. My son is 2½ now (exactly 30…

Spring Tissue Paper Flower Craft for Toddlers (Easy & Calm)
We needed something calm… not messy… and something he could actually do himself. So after…

Easy Spring Bird Paper Craft (FREE Template for Kids)
This is a super easy structured craft ready to go for when my child is…

 (1)")


")
 (2)")